Thursday, December 20, 2012

Hayley's Nursery. 

Pink and gray Nursery.


 Her nursery is finally finished! 

Well almost.... I'm missing a few pictures, but other than that, this is the finished product. 

Simple, elegant.

I wanted pale pink, pale gray and white. 

 I made this lamp that I saw on a Pinterest post here


 We took the 'Hayley' picture while we were in the Bahamas this summer. This was before we knew for sure what her name was, so we took several pictures with all the different names we liked! 


 This was the 'guestbook' from the baby shower. I absolutely love this idea. I got it from this Etsy shop here.
She has tons of others too!


I had the baby bedding custom made from this Etsy shop. Here. They allow you to pick the fabric!


This butterfly mobile came from this Etsy shop, here.


I wanted a white bookcase. It came from Target. I bought a white valence from Wal-mart, and then sewed yo-yos on the bottom. 


Some of the extras on the shelves:
 Got the giraffe piggy bank at Home Goods.


 I made the blocks, see my post here on how.


 A fantastic friend of mine made the doll. Her blog is here. You should follow her.


 I love the little porcelain birds I picked up here and there. A nice touch.


The Antique chandelier (seen in first photo) came from Lowes, here.

Target bookcase, here. 

My Hayley's baby shower.


 A pink and gray baby shower. 

It turned out perfectly.


I absolutely LOVE this idea for a guest book. You can find this on Etsy here.  


Just have everyone sign with a special note or message on each of the circles, attach them to the print, frame and hang!


Believe it or not, this cake came from WALMART! 

I was shocked too. 
We are lucky to have a wonderful, talented baker there. 
 The design was from an Etsy shop, found here.
 

Adorable  little tags found on Etsy too! Here are some similar ones.


Simple and elegant.


 Baby shower bingo, from you guessed it....Etsy! Here.


 We had a fun raffle. We had a game where someone would draw out a paper with a baby item written on it, and they had to draw it on a dry erase board. A pacifier and baby bottle were the most comical!

 It was a beautiful baby shower! I am so grateful to everyone who planned it, attended, and made it special!


Wednesday, December 19, 2012

Best of Elf On The Shelf

I say 'Best' because its what my kids have enjoyed the most so far.


.


Saturday, November 10, 2012

DIY burlap placemats


EASY   DIY  Burlap Placemats


Buy the burlap at your local fabric store.
Use a standard size place mat as your template.  


Cut.
 

Use a stencil for what ever words you want to use. 
I had a friend cut this with her Cricut. 
(Note- If you are going to be doing several place mats, cut more than one stencil...this cardboard one wore out fast)


 Black acrylic paint. Use a SPOUNCER, not a 
foam brush.


I used the end of a paint brush for my period. 

Use some Aleene's Stop Fraying for the 
edges of the burlap.  

Done! 


Wednesday, October 17, 2012

DIY Baby blocks


I saw similar blocks on Etsy, and my budget wouldn't allow for them. Yikes!

So I decided to make my own.

Totally easy and inexpensive!

I just love the way the turned out!

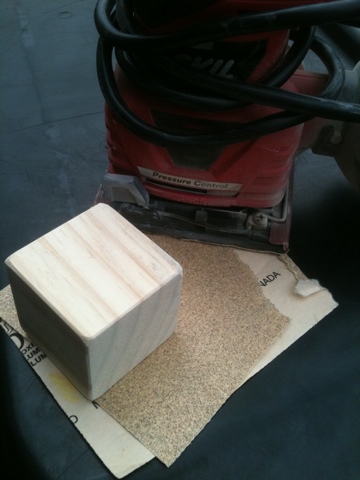
First I went to my local craft store & bought nine 2.5" wooden blocks. They were a $1 each. I'm sure they go on sale from time to time but I'm in a time crunch here!

Start by sanding down the edges to round them off and make them smooth. This could be done by hand, but would be very tedious. I used our handheld electric sander.


I already had some scrapbook paper on hand, but picked up a couple extra sheets at the craft store. Then I used my 2.5" square punch to cut out the perfect little squares. These punches can be quite expensive, so I'd recommend borrowing one or waiting to use a half-off coupon if you're going to buy one.


Just break out the good 'ole mod podge! It's a water based non-toxic sealant.
Apply a coat first, then apply one of your paper squares. More mod podge on top. Be generous, you want your paper saturated. Clean up the edges though as you go.
I applied one last coat over the entire block after all my sides were done.


Done! Easy peasy!

Overall, I paid around $11-$12 for these. If I had waited for sales, it would've been even cheaper. But much better than the $40-$60 I would've paid on Etsy!